
As prelude supports multiple uses of Microsoft's stack you can configure a single "app registration" to cover all uses, instead of one for EDR, one for Endpoint Management, one for Email etc. We do this by combining the IAM Roles and API permissions
To attach Prelude to a Microsoft App registration, you will need:
- The Prelude Dashboard / UI (US1 | EU1) or Prelude CLI
- An Azure user with Global Administrator role
In Azure
- Navigate to the App registrations section in the Azure Portal.
- Select "+ New registration" toward the top of the page.
- Enter a name for your application
- Choose Single tenant as the supported account type (Accounts in this organizational directory only). Click Register.
- Leave Redirect URI (optional) as it is.
- After registration:
- Note down the Application (client) ID and Directory (tenant) ID from the app's Overview page.
- In the left menu, expand the Manage section and select Certificates & secrets and create a new Client Secret:
- Click New client secret, enter a description, and set an expiration period.
- Note down the generated Client Secret Value (you won’t be able to view it later).
we now have:
- APP ID (Application (client) ID) from step 6
- TENANT ID (Directory (tenant) ID) from step 6
- APP SECRET (Client Secret Value) from step 7
Roles and API Permissions Summary
While step by step guidance is provided in the next section, here we provide a quick summary table of all API Permissions and IAM Role Assignments required
| Use-Case | API | Permission Type | Permission |
|---|---|---|---|
| Defender | Microsoft APIs / Microsoft Graph |
Delegated | User.Read |
| Defender | Microsoft APIs / Microsoft Graph |
Application | ThreatHunting.Read.AllCustomDetection.ReadWrite.All(*)DeviceManagementConfiguration.Read.All |
| Defender | APIs my organization uses / WindowsDefenderATP |
Application | Machine.Read.AllAlert.Read.AllTi.Read.All |
| Intune | Microsoft APIs / Microsoft Graph |
Delegated | User.Read |
| Intune | Microsoft APIs / Microsoft Graph |
Application | Device.Read.AllDeviceManagementConfiguration.Read.AllDeviceManagementManagedDevices.Read.All |
| M365 (Email) | APIs my organization uses / Office 365 Exchange Online |
Application | Exchange.ManageAsApp |
| EntraID | Microsoft APIs / Microsoft Graph |
Application | AuditLog.Read.AllIdentityRiskyUser.Read.AllPolicy.Read.AllUserAuthenticationMethod.Read.AllUser.Read.AllDeviceManagementConfiguration.Read.All |
(*) Only required if sending detections to Defender. Not required for Security Control Monitoring
| Use-Case | Role |
|---|---|
| Defender | N/A |
| Intune | N/A |
| M365 (Email)* | - Security Reader |
| EntraID | N/A |
(*) If your M365 configuration does not provide sufficient permission to Security Reader for reading the M365 policies then a higher, or custom role can be used.
the next section provides a step by step guide to configure the API Permissions and Roles
Granting API Permissions
- In the left menu of the app you created, select API permissions and click Add a permission
- Under "Microsoft APIs" select Microsoft Graph
- Select Application permissions (not Delegated) and add the following API Permissions.
User.ReadMachine.Read.AllThreatHunting.Read.AllCustomDetection.ReadWrite.AllDeviceManagementConfiguration.Read.All
- Under "Microsoft APIs" select Microsoft Graph
- Select Delegated Permissions and add the following API Permissions:
User.Read
- Select Application permissions (not Delegated) and add the following API Permissions.
Device.Read.AllDeviceManagementConfiguration.Read.AllDeviceManagementManagedDevices.Read.All
- Under "APIs my organization uses" search for: "Office 365 Exchange Online" select Office 365 Exchange Online
- Select Application permissions (not Delegated) and add the following API Permissions.
Exchange.ManageAsApp
- Under "Microsoft APIs" select Microsoft Graph
- Select Application permissions (not Delegated) and add the following API Permissions.
User.ReadMachine.Read.AllThreatHunting.Read.AllCustomDetection.ReadWrite.AllDeviceManagementConfiguration.Read.All
Note: After adding the above permissions ensure you select "Grant admin consent for " as show in the screenshot below:

- Navigate to Entra ID in the Azure portal
- Expand Manage and select "Roles and Administrators" on the left hand side
- Search for the "Security Reader" role and click on it
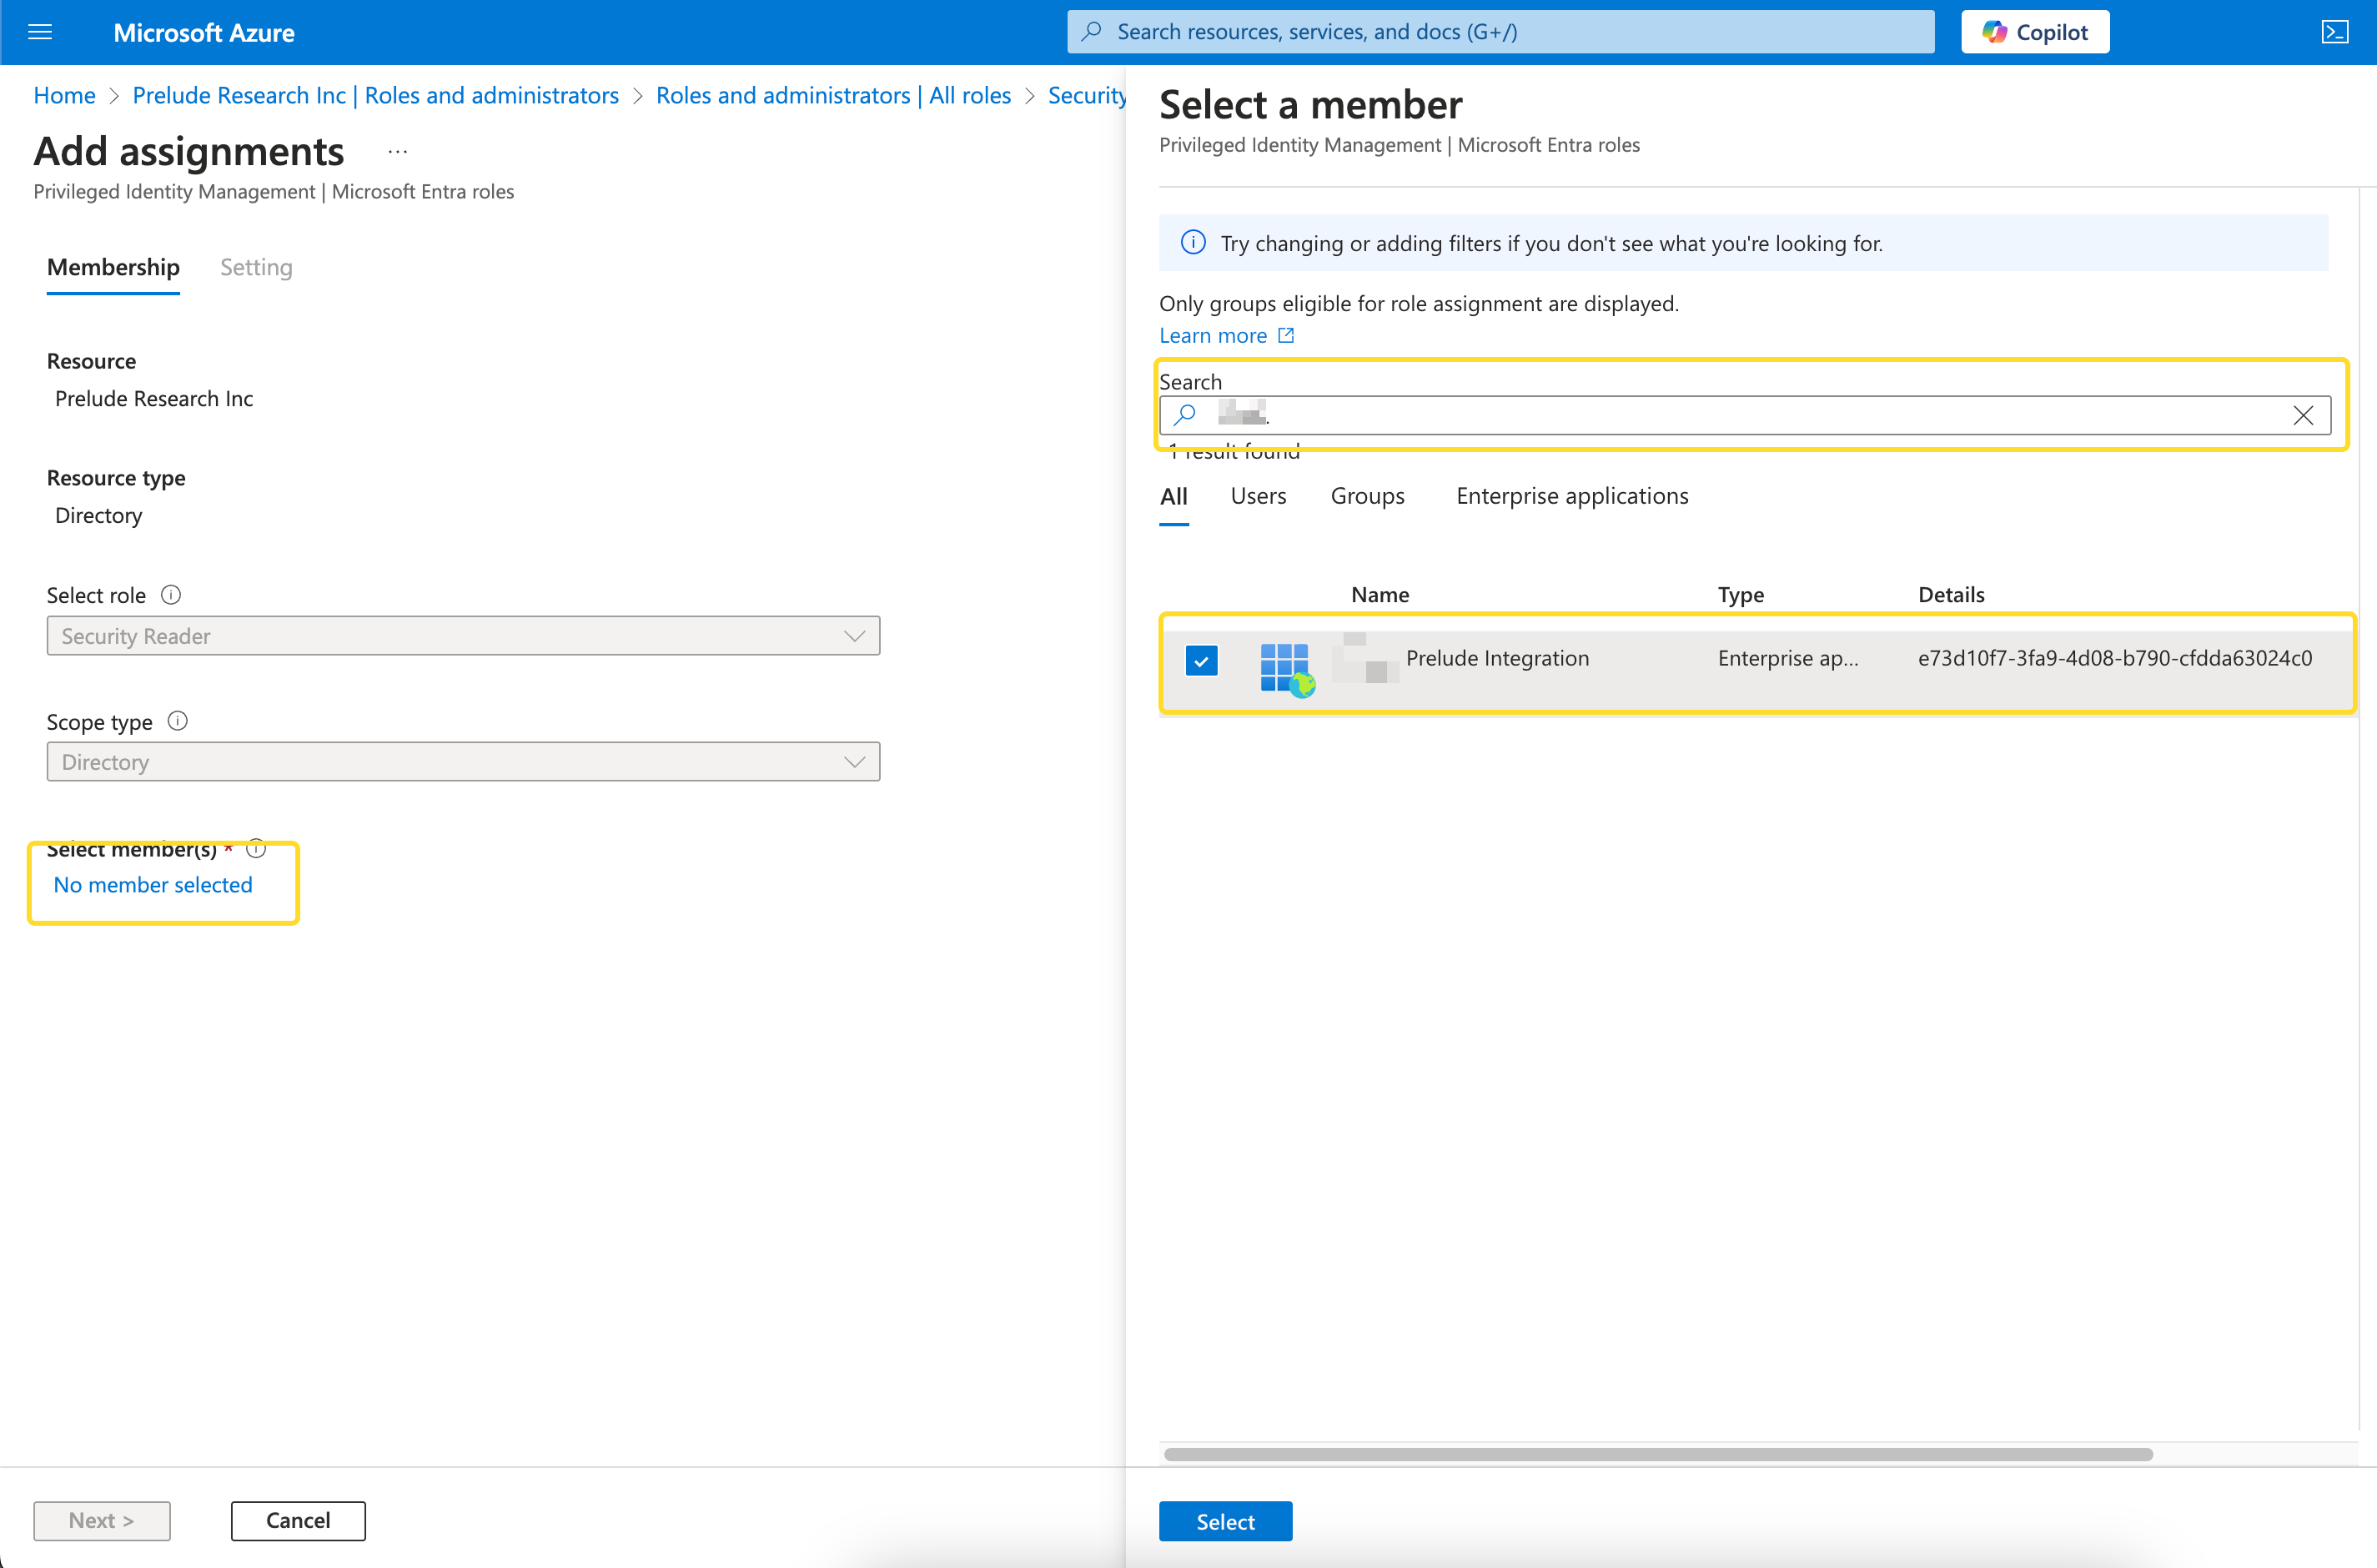
- On the next screen, select Add Assignment
- In the "Search" field, enter the whole App ID that you created in the above steps and assign it to the Security Reader role:
Follow the instructions to attach the relevant technology: